
Flashback to that time when my middle daughter proudly proclaimed that her chicken cutlet is legendary in some circles and she doubted mine could be better. As a food blogger and not being one to back down from a challenge —unless involving hot dog eating or swimming — I quote Barney Stinson when I say, “challenge accepted!”
Allow me to introduce you to the crispiest, juiciest chicken cutlet recipe you’re ever going to make.
I know. Those are lofty claims. But if you follow my seasoned advice for how to make a golden, juicy chicken cutlet, you’ll be rewarded.
And you’ll be able to stand proud, knowing you’re the best chicken cutlet maker in your crowd. Serve it with a big Caesar salad and some caramelized roasted tomatoes for a hearty but easy summer dinner.
This post contains links to affiliate websites including Amazon. I make a small commission for any purchases made using these links. Thank you!
Qualities of an Italian chicken cutlet
Save This Recipe!
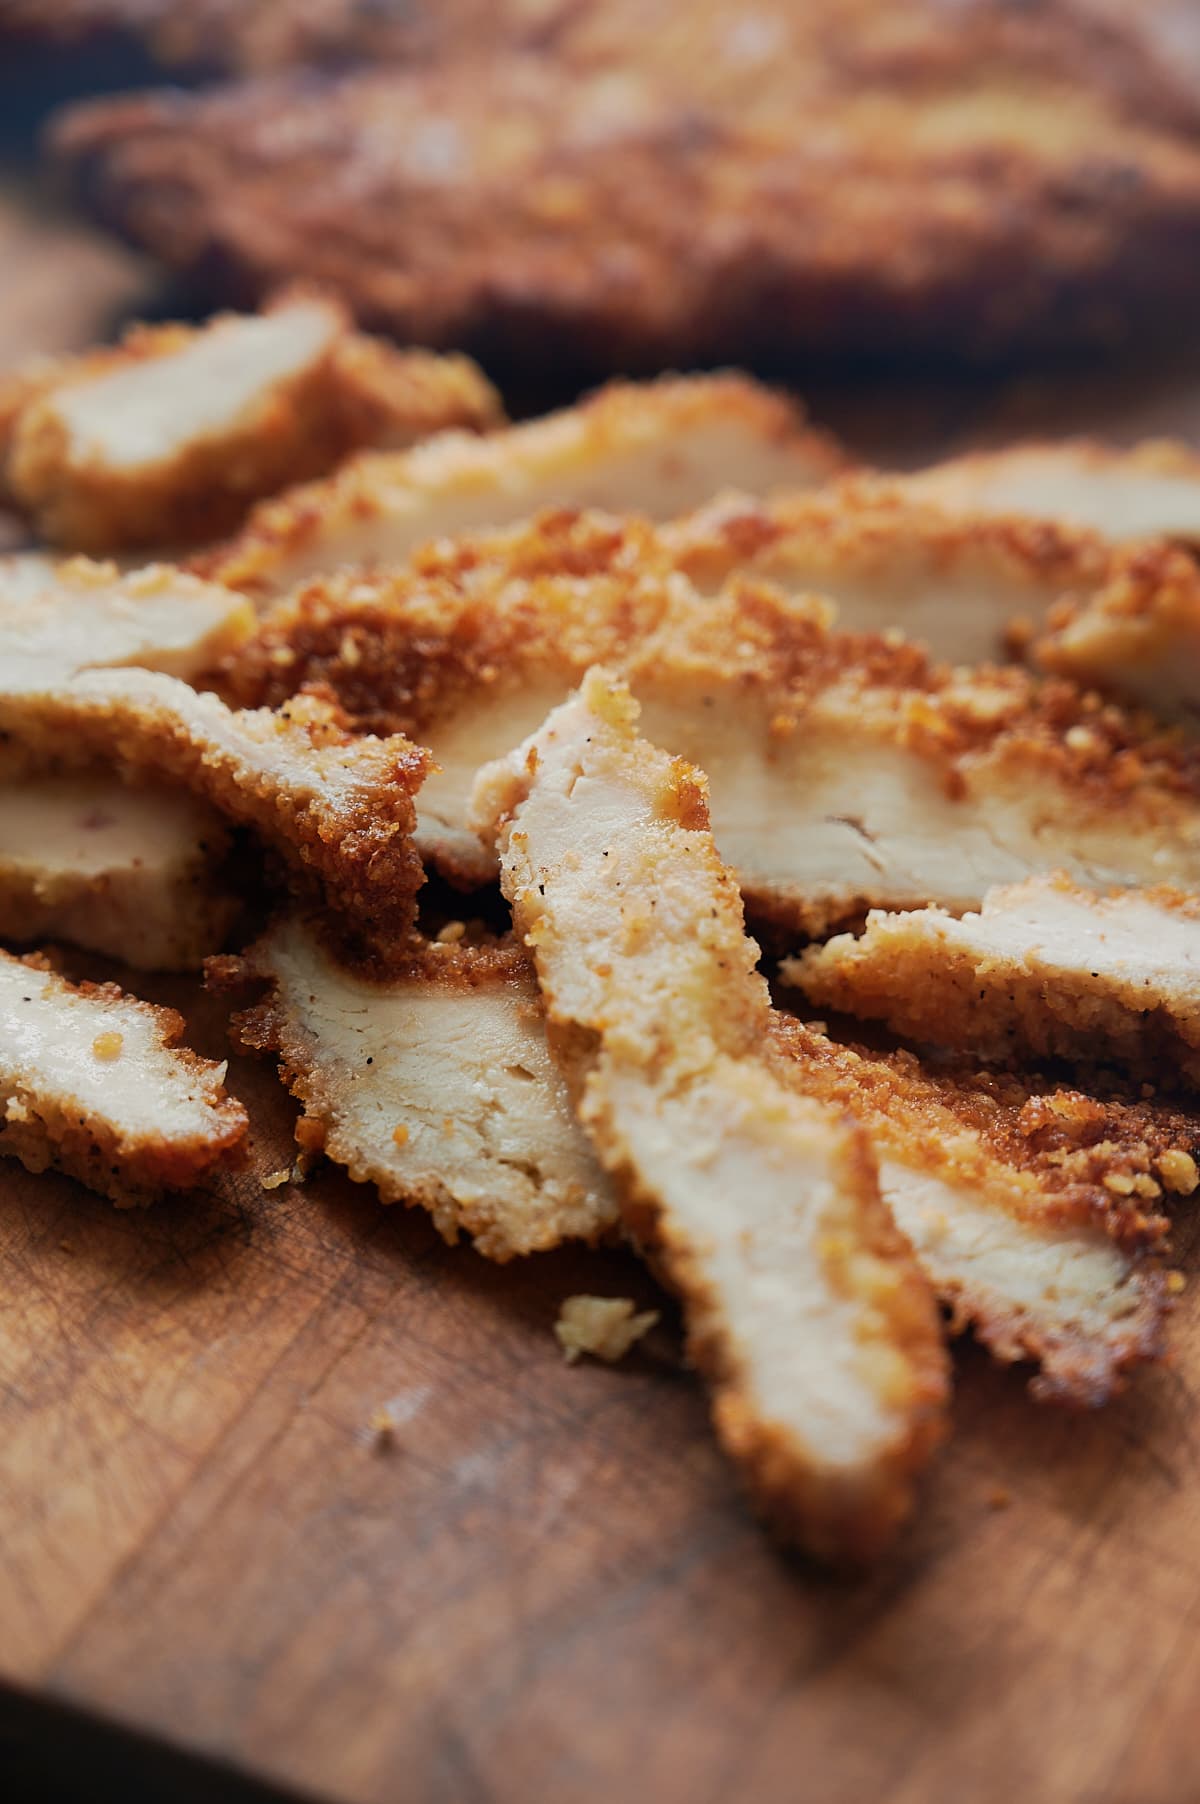
From the first bite, I want you to hear that “cruuuuunch”! Here’s all that makes a chicken cutlet a chicken cutlet:
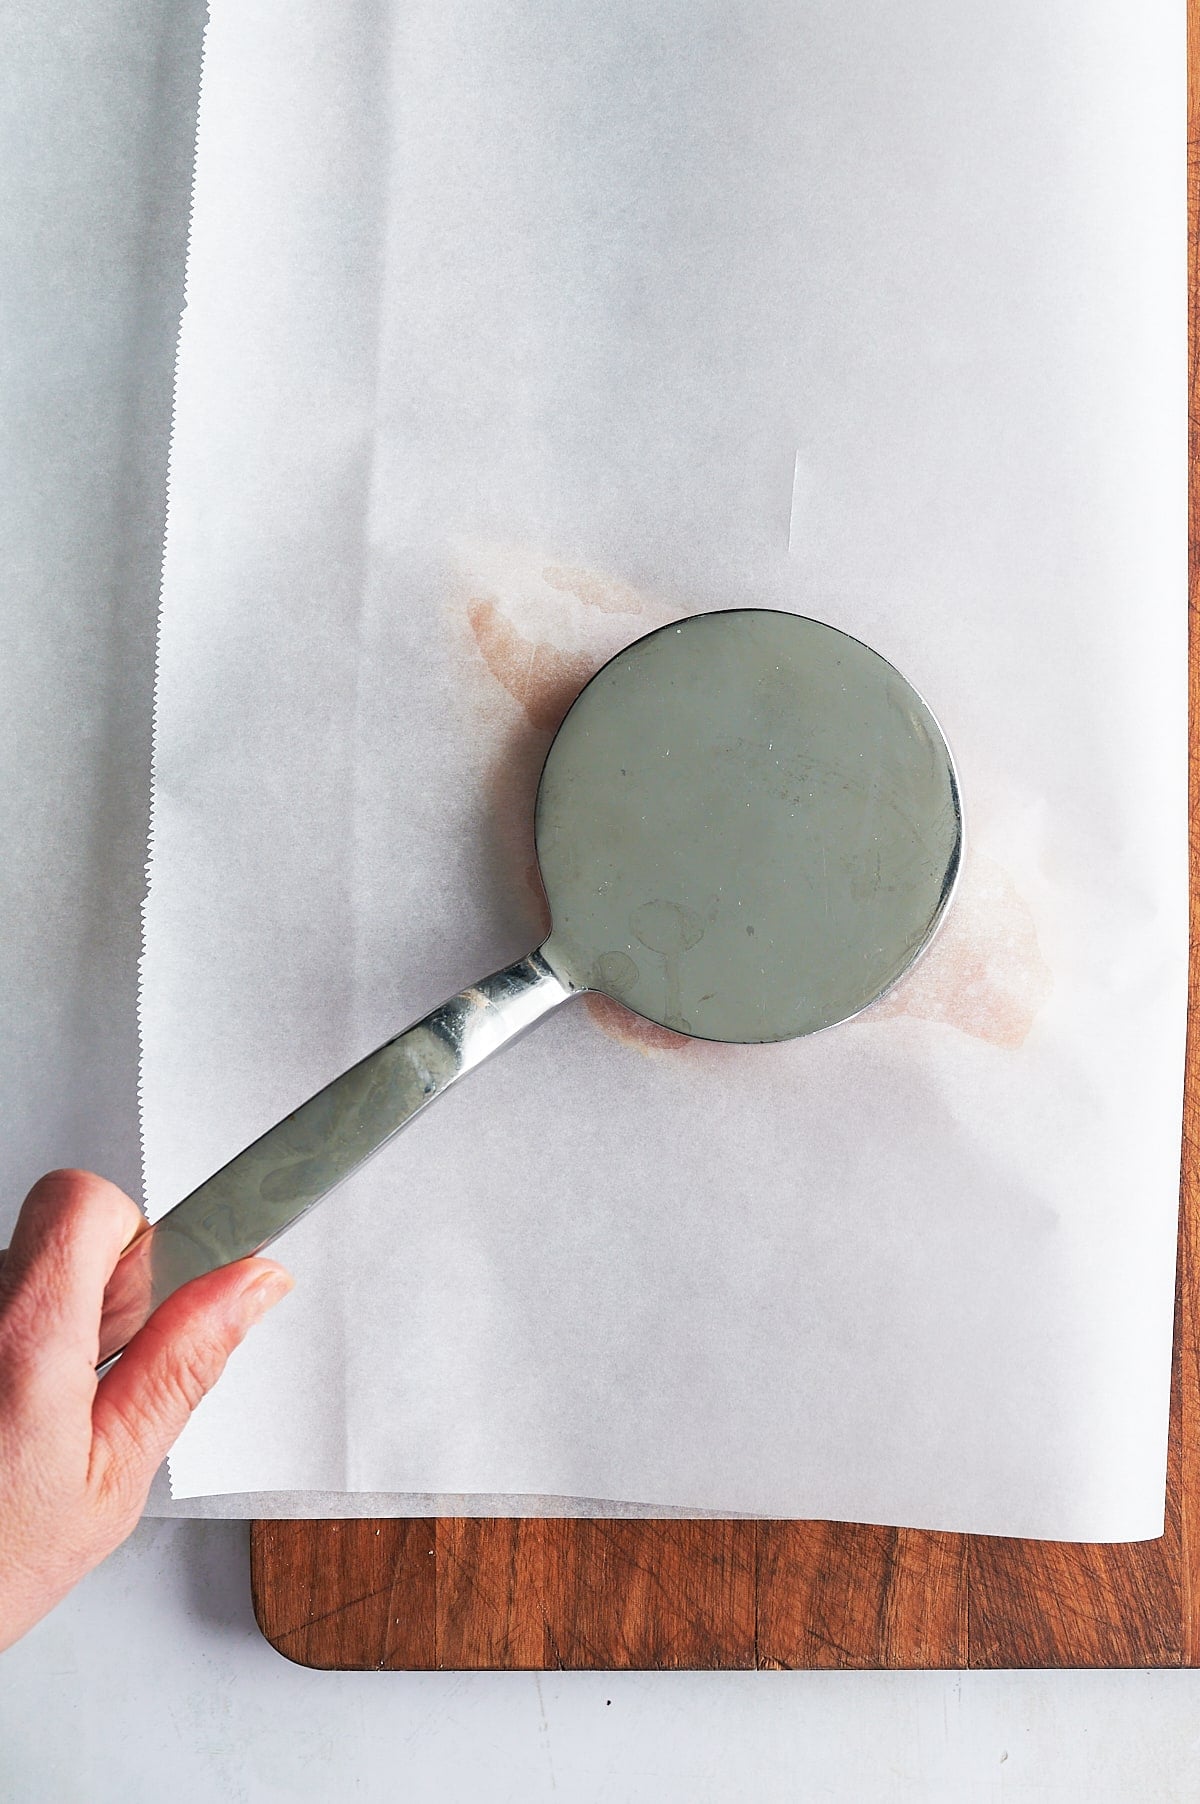
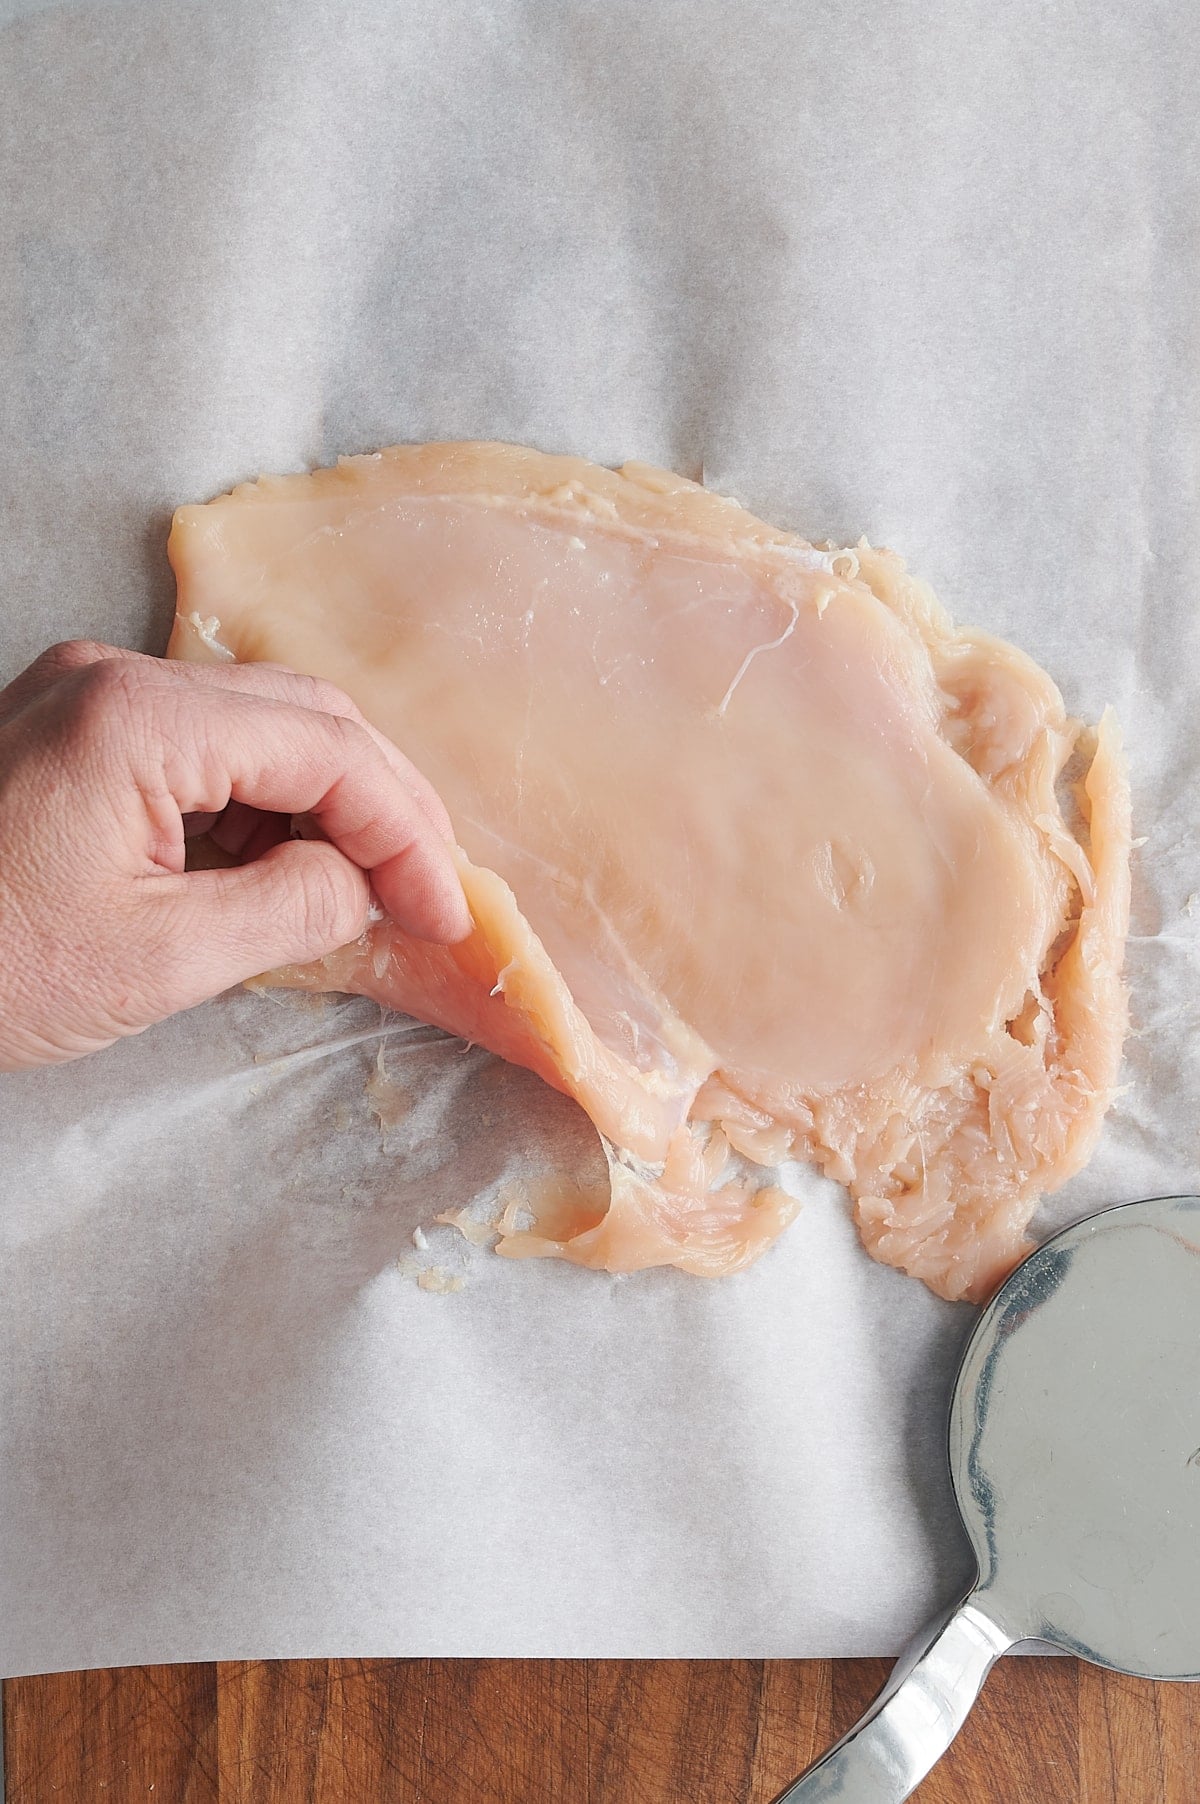
- Pounded thin. And I mean thin! This chicken breast is going to grow! p.s. if you used a regular chicken breast without thinning it out, it likely would burn on the outside and be raw on the inside.
- Pan-fried. Italian chicken cutlets are typically fried in a skillet or Dutch oven. Check out this baked chicken cutlet that my family has been making forever.
- Well-seasoned breading. We are going to season the cutlet through each step with a mixture of kosher salt, ground black pepper and some big, warm spices to add some oomph.
- Crispy crispy crispy texture. A three step breading process makes this a really crispy breaded chicken. Think flour>>>egg>>>breadcrumbs.
Prep steps to gather
A meat mallet with a flat side. You can also use the bottom of a skillet.
Parchment paper. It’s sturdy enough for pounding the chicken flat without tearing or shredding.
A wide skillet with a flat bottom and higher sides. You can use a frying pan but take extra care as there might be some splatter when the chicken goes into the oil.
A reliable oil/candy thermometer. Make sure the thermometer you choose has a clip to attach itself to the sides of the pan. This way you’ll be able to monitor the temperature of the oil and adjust your temperature as needed.
Set of metal tongs. Preferably on the longer side. Avoid tongs that aren’t heat safe up to 425˚.
Cooling rack set over a paper towel lined sheet pan. To use for draining the cooked chicken when it comes out of the pan.
Basic ingredients for Italian chicken cutlets
These are Italian so you can probably guess that I’m using some cheese (✔️) and some garlic (✔️✔️).
Here’s everything else that you’ll need:
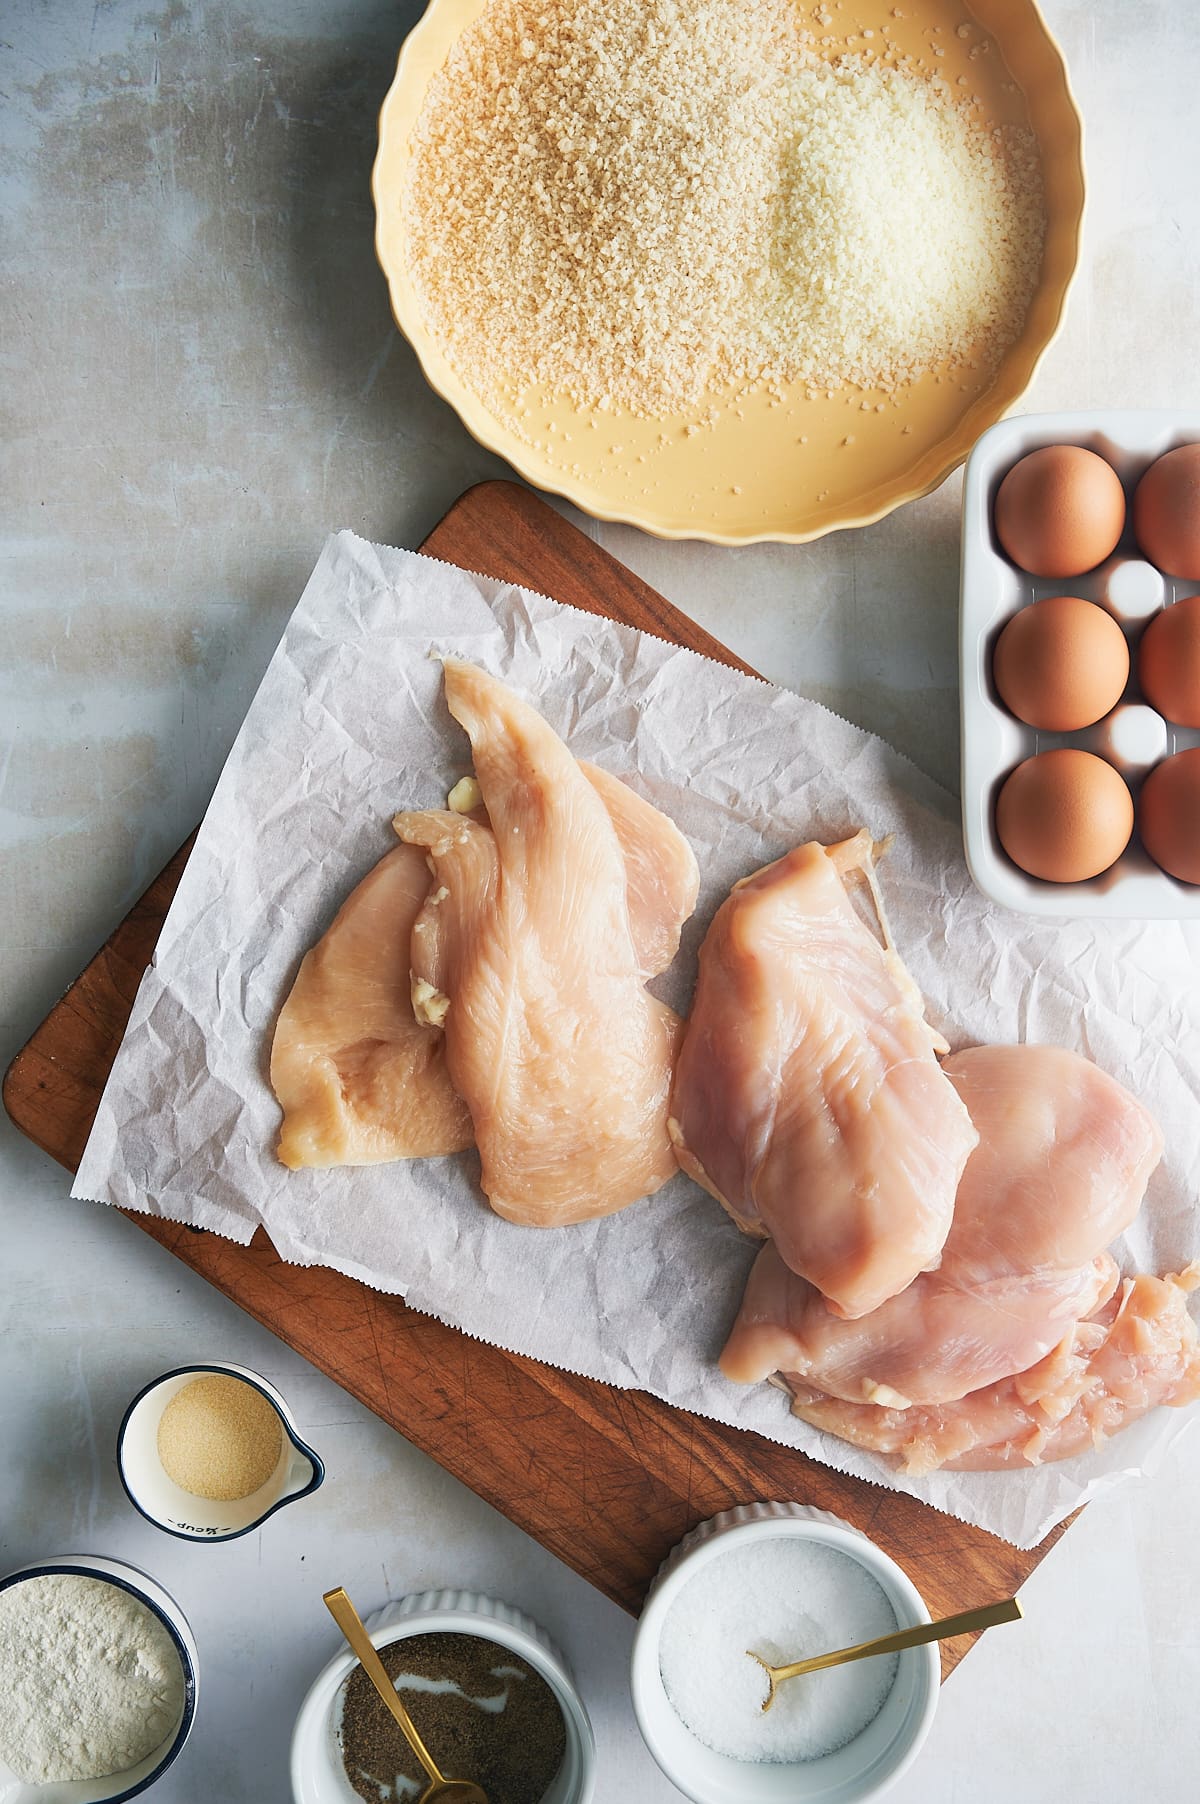
Chicken breasts. I love air-chilled chicken breasts or the ones I can get from my favorite butcher. Buy the best quality your budget can handle.
Also…make as many pieces of chicken as guests you have coming for dinner. When flattened, the chicken gets really BIG so 1 is probably plenty but if you want leftovers, make some more!
Breading
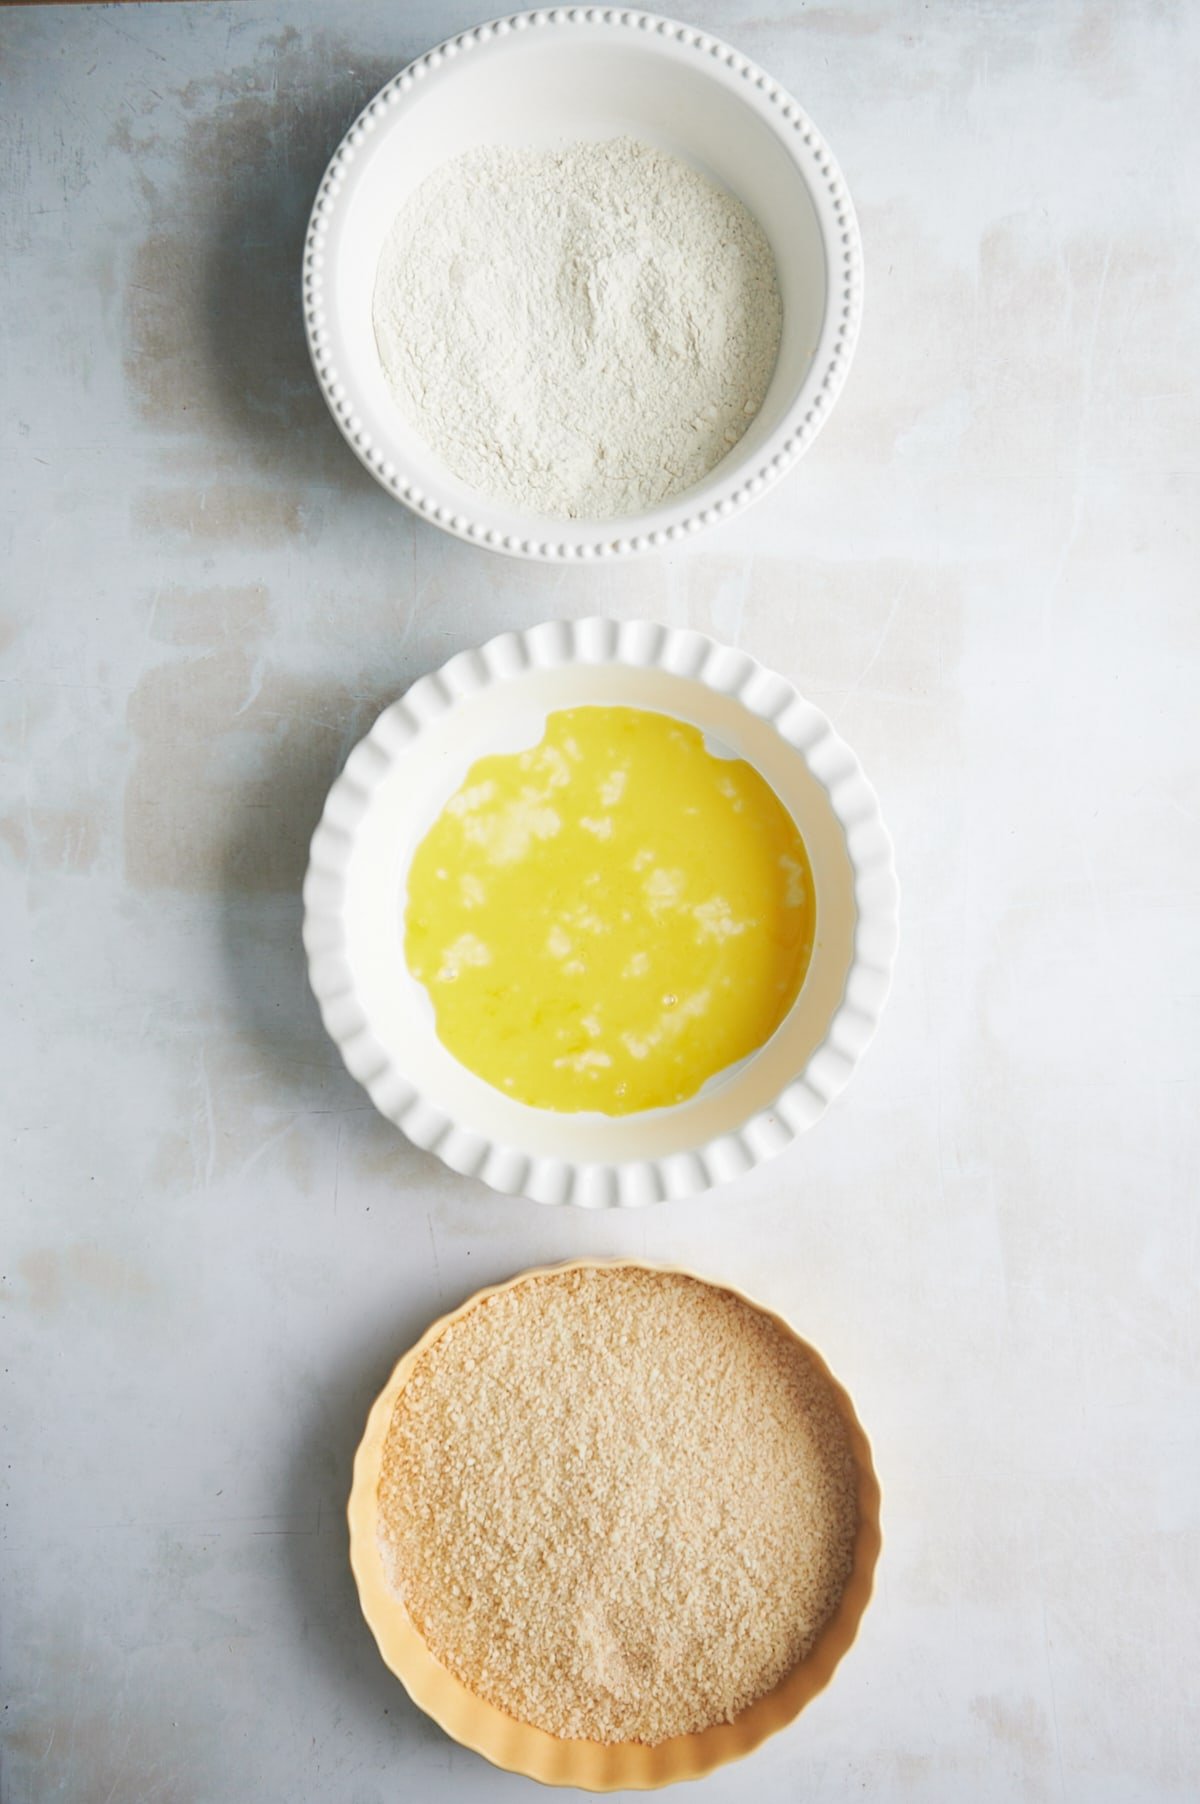
- BASE LAYER. The foundation that allows the breading to stick beautifully to the egg without falling off.
- Flour. All-purpose works beautifully.
- Seasoning. Kosher salt and ground black pepper
- WET LAYER
- Egg. Easy, right?
- OUTSIDE COATING. The crunch maximizer and the flavor wrap all in one.
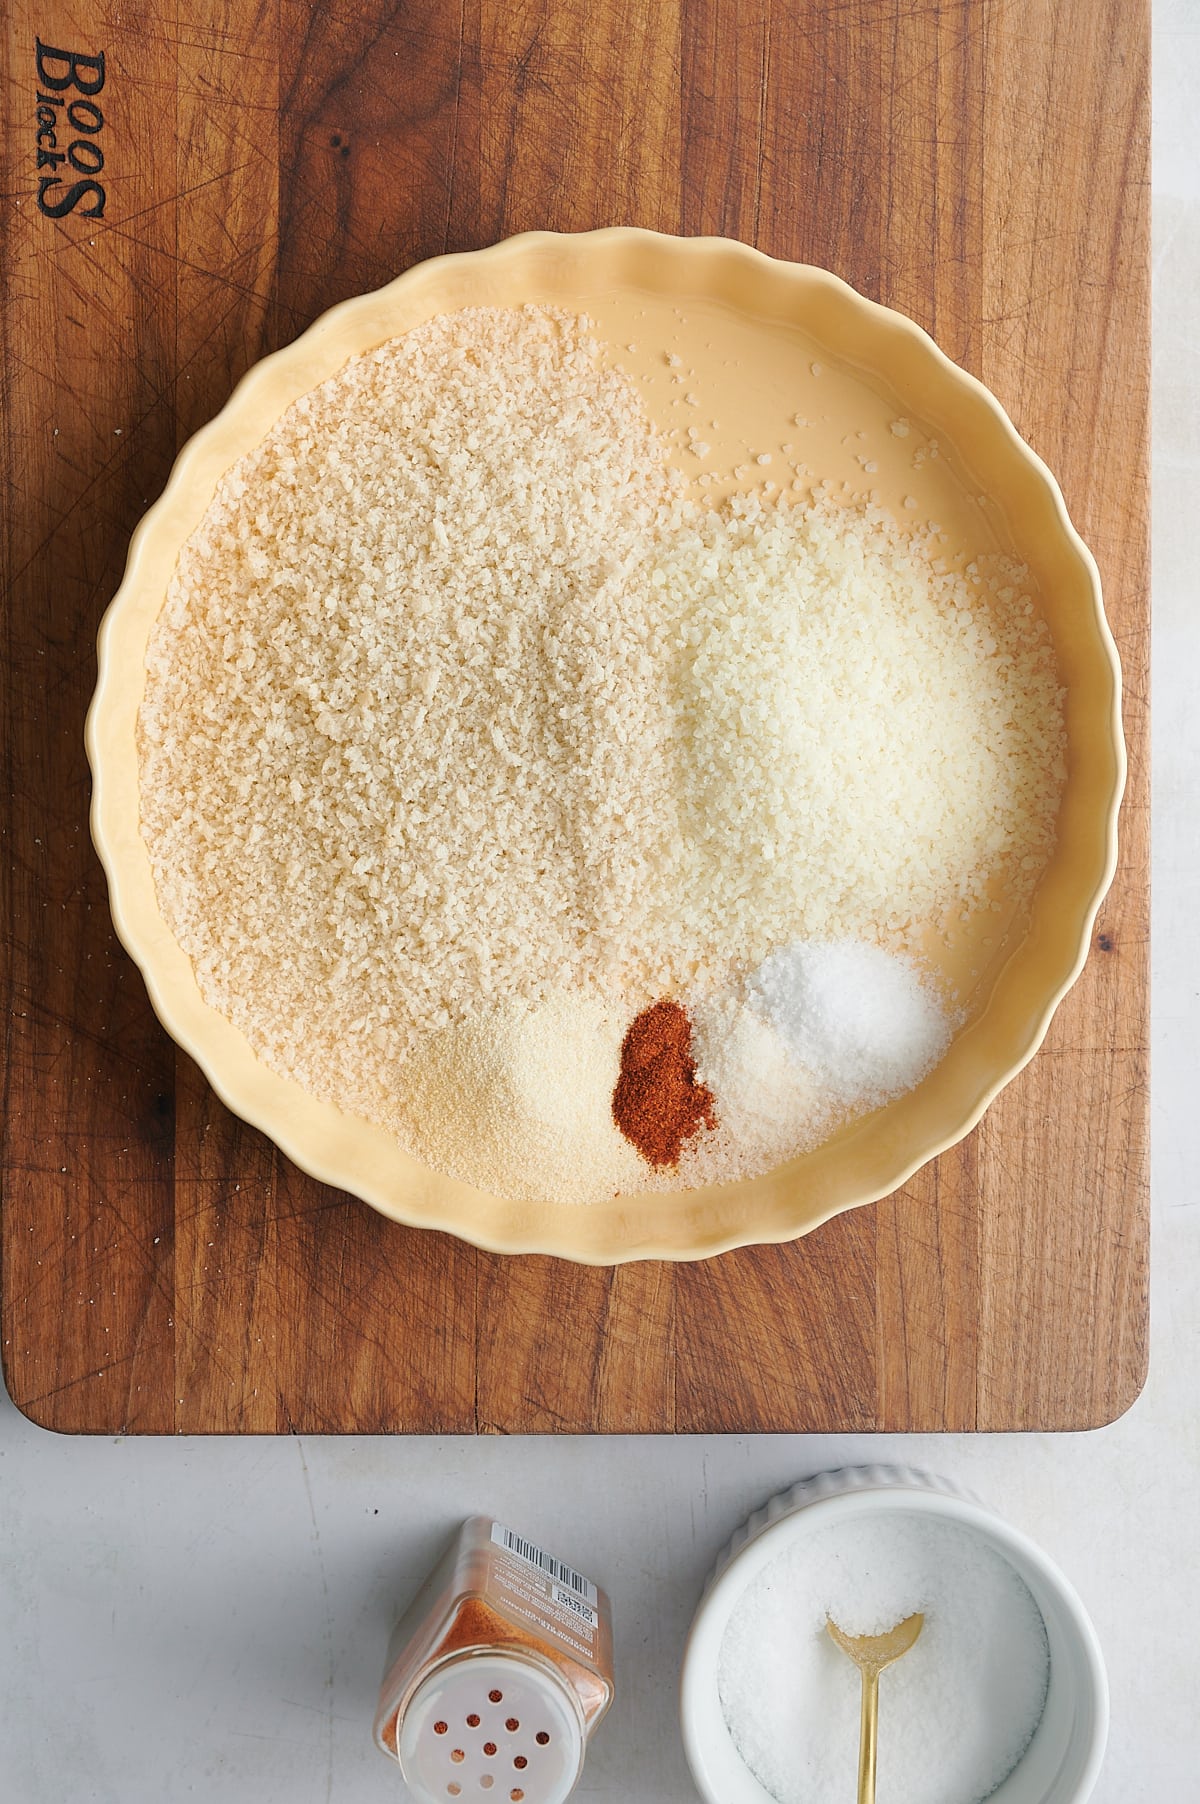
- A blend of fresh grated parmesan cheese and plain panko breadcrumbs.
- Seasoning blend that includes garlic salt, cayenne pepper and more salt and pepper.
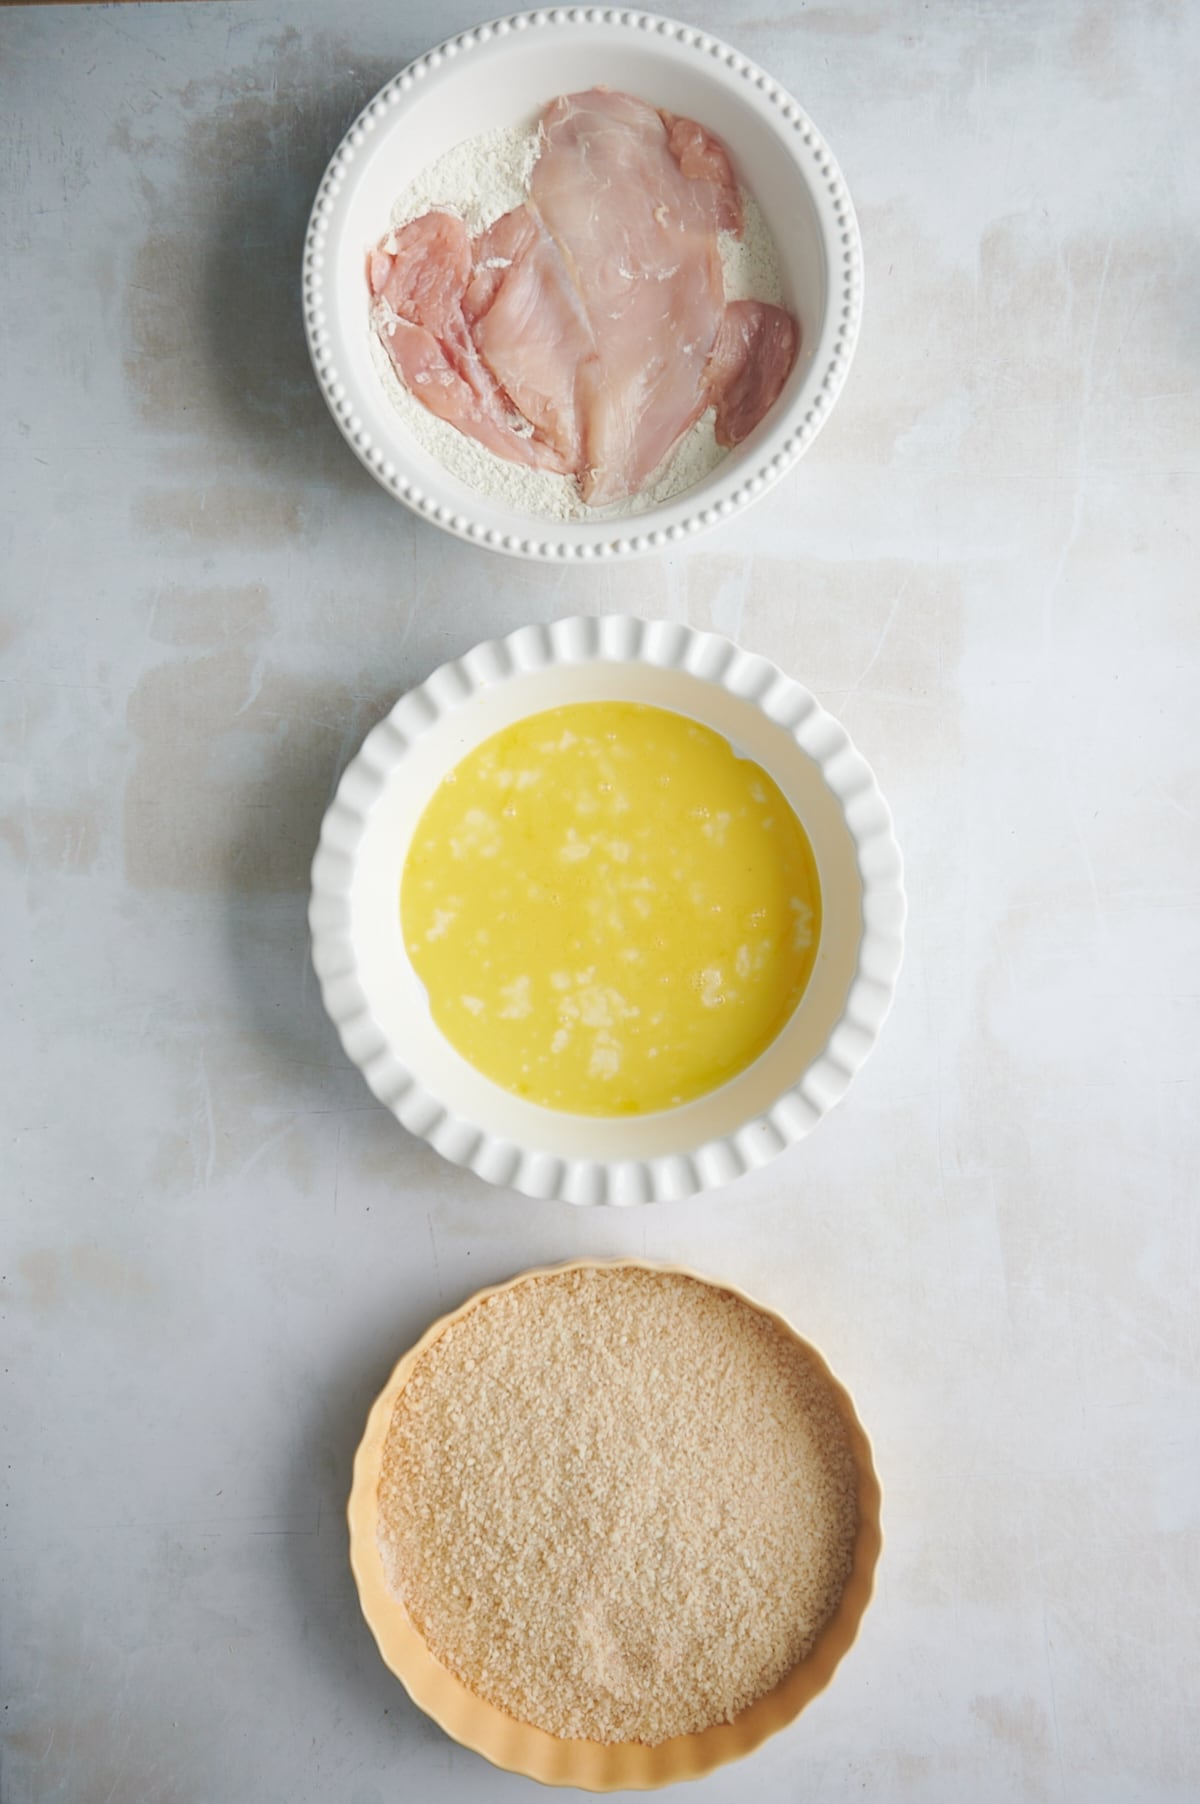
Pro tip
Use pie plates for each layer of the breading station with each step prepped and ready to go for quick and easy execution.
Step by step instructions

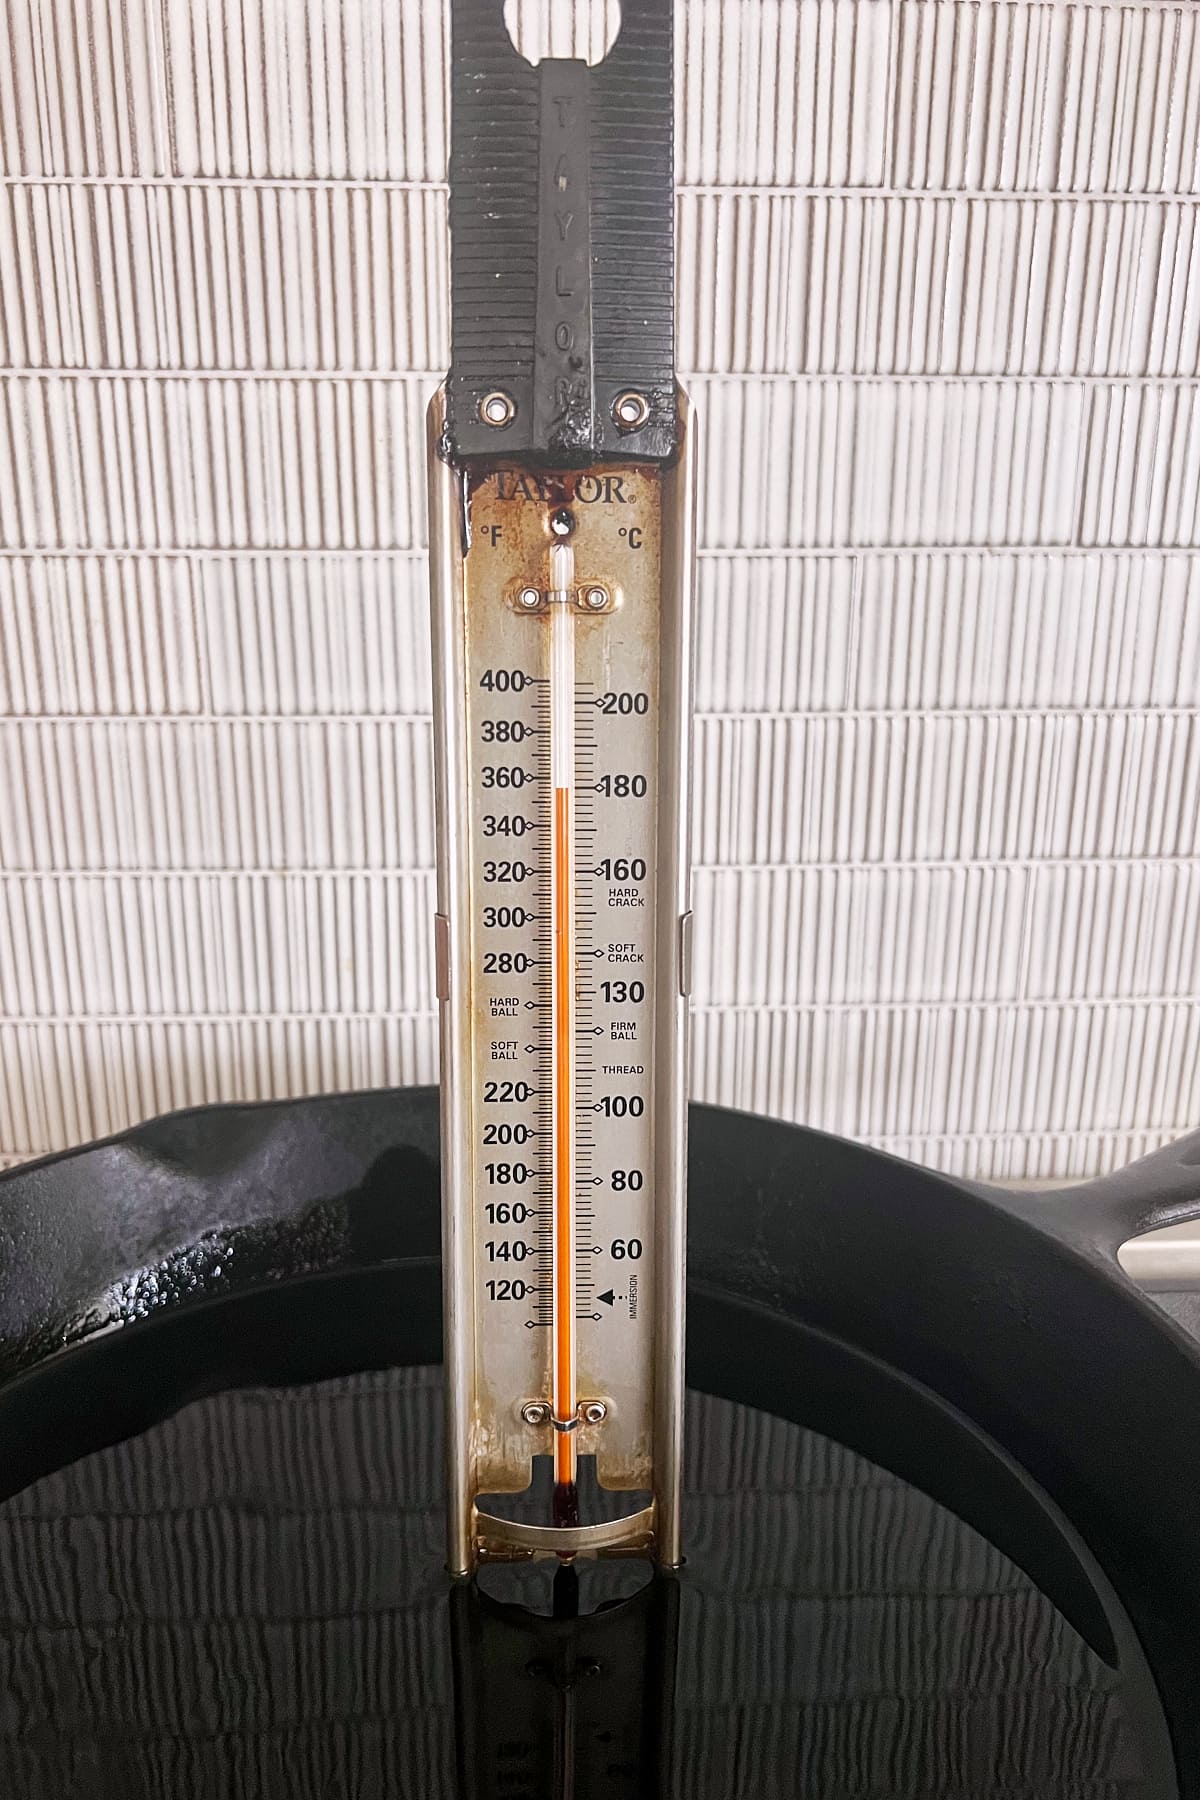
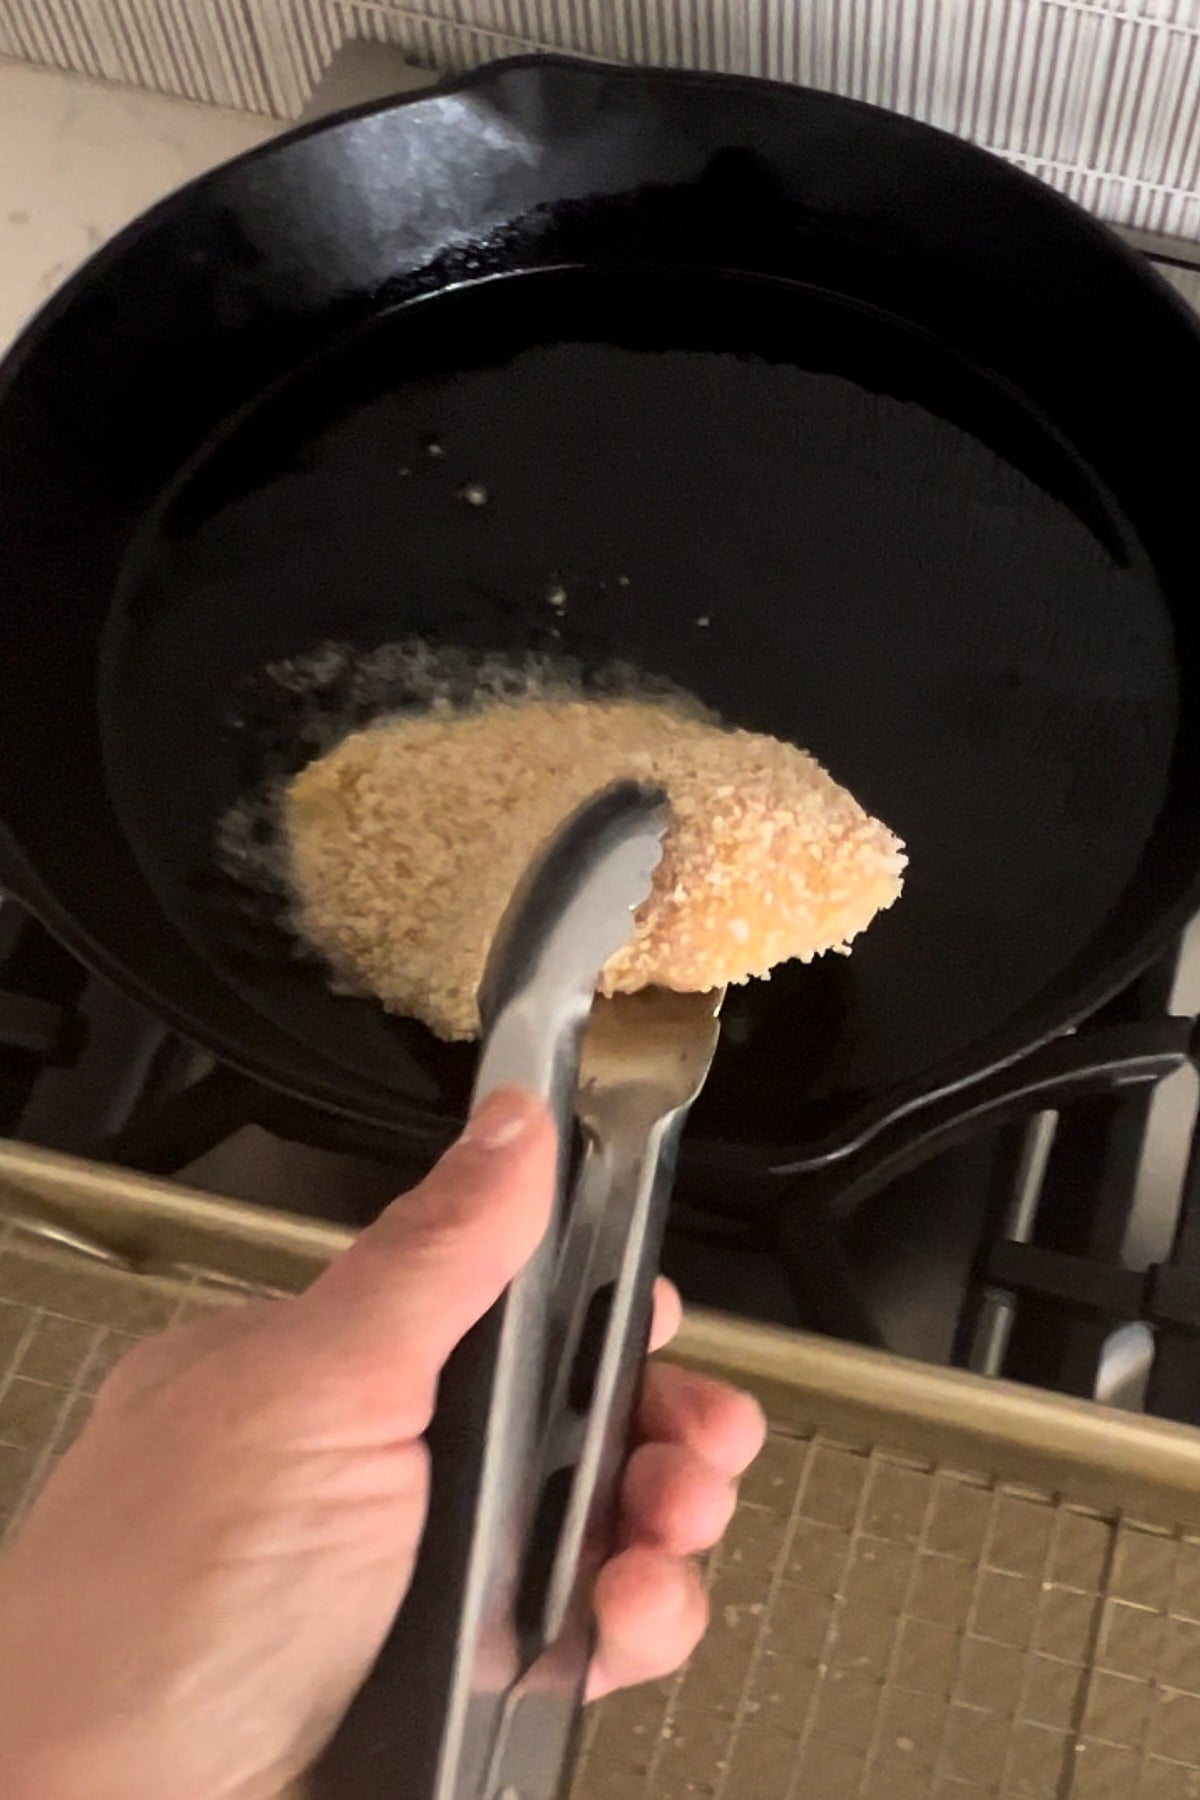
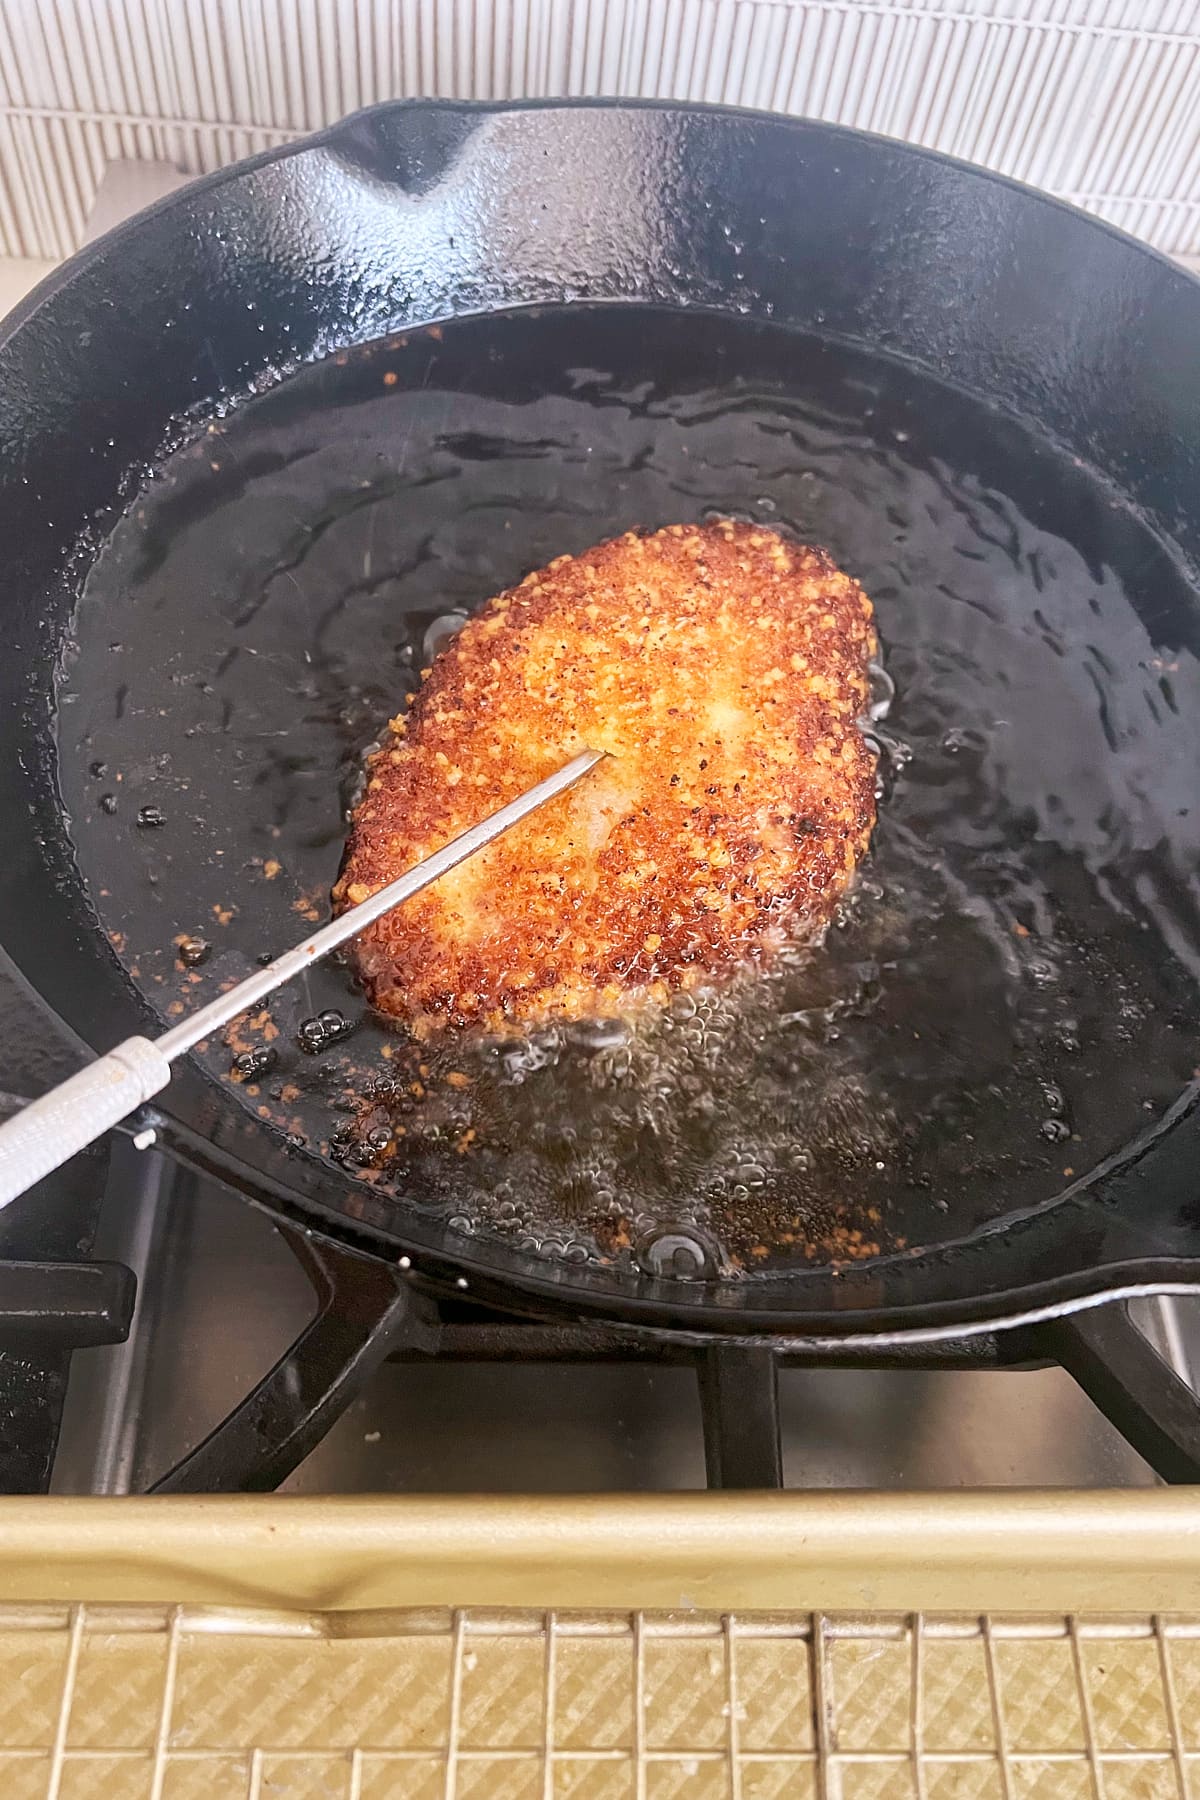

Recipe testing note
I tried this recipe using a cast iron skillet (shown above). It conducted too much heat making it brown too quickly on the outside. A stainless steel pan is best!
-Josie + Nina
You want to make the best chicken cutlets, right? Follow these tips…
Skip the “thin” cut chicken or tenderloins
While you can use thin chicken breasts for chicken cutlets, there is a chance they could be too thin and you won’t get the same results. I also would advise against using tenderloins. They won’t be cutlets. They’ll just be chicken tenders.
Which of course there’s nothing wrong with that but the cooking time will definitely have to be adjusted.
And they won’t be chicken cutlets. 😉
Let the chicken chill
Don’t skip the step of letting the breaded chicken chill, uncovered, in the fridge for at least 30 minutes before frying. This dries out the chicken and makes for an even crispier crust!

Made this recipe?
I’d love it if you’d share your review and leave a star rating and comment!

Crispy Italian Chicken Cutlets
SAVE THIS RECIPE
Equipment
- longer set of tongs
Ingredients
- 4 chicken breasts, air-chilled chicken is what I use. Do not use tenders, tenderloins or thin cut breasts.
Breadcrumb Layer
- ½ cup panko breadcrumbs
- ½ cup grated Parmesan cheese, freshly grated
- 2 teaspoons roasted garlic powder
- 1 teaspoon kosher salt
- 1 teaspoon onion salt
- ¼ teaspoon cayenne pepper
Egg
- 1 large egg, beaten
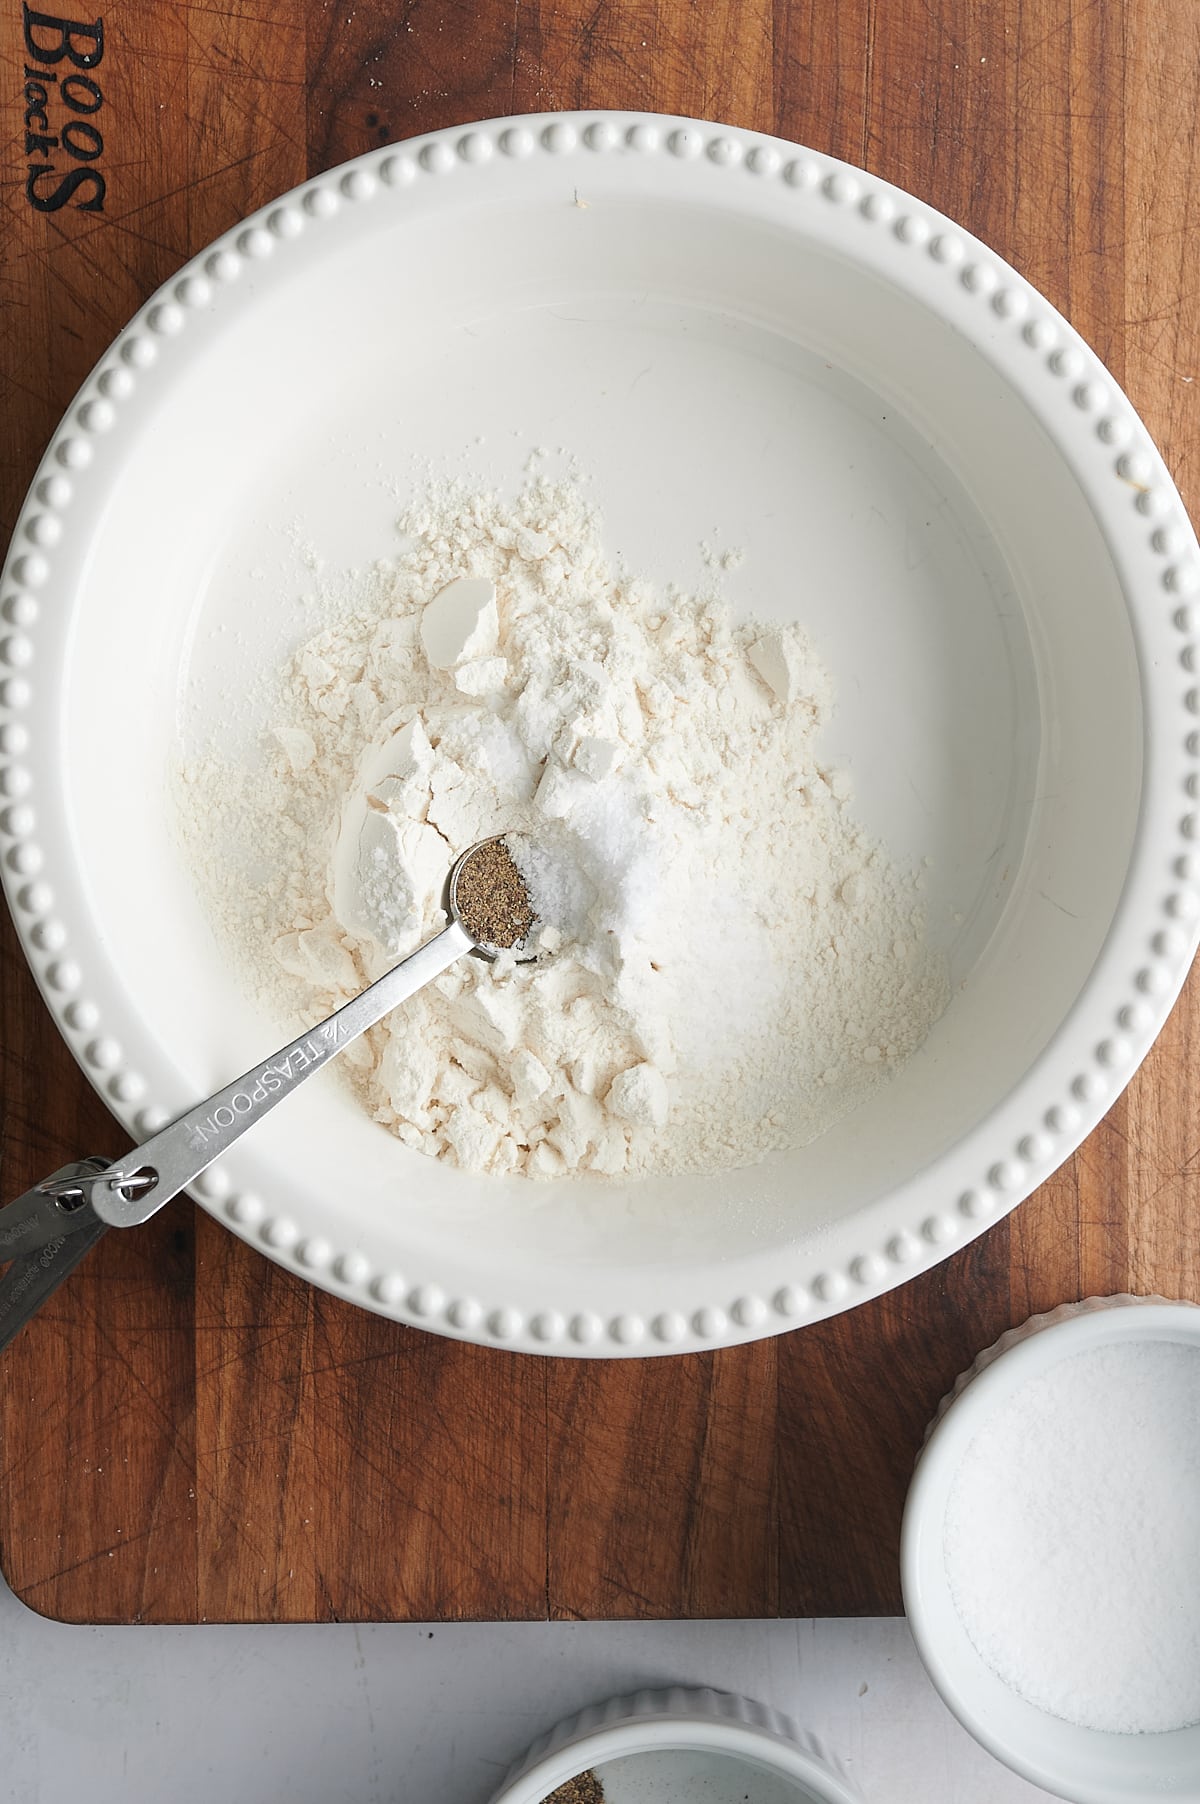
Flour Layer
- ½ cup all purpose flour
- 1 teaspoon kosher salt
- ½ teaspoon ground black pepper
To fry
- 24 oz canola or avocado oil, or half a 48 oz bottle
Instructions
- Pat the chicken dry.Use a flat meat mallet or tenderizer and flatten the chicken thin between two sheets of parchment. You’re looking for the chicken to be about 1/4 – 1/8″ thick.4 chicken breasts
- Make your breading station by gathering three pie plates or wide plates/bowls with edges or sides. In the first dish ,blend the breadcrumbs, cheese, both salts, cayenne and pepper in the 3rd dish½ cup panko breadcrumbs, ½ cup grated Parmesan cheese, 2 teaspoons roasted garlic powder, 1 teaspoon kosher salt, 1 teaspoon onion salt, ¼ teaspoon cayenne pepper
- Crack and whip the egg in the 2nd dish.1 large egg
- In the 3rd dish, mix the flour with the salt and pepper.½ cup all purpose flour, 1 teaspoon kosher salt, ½ teaspoon ground black pepper
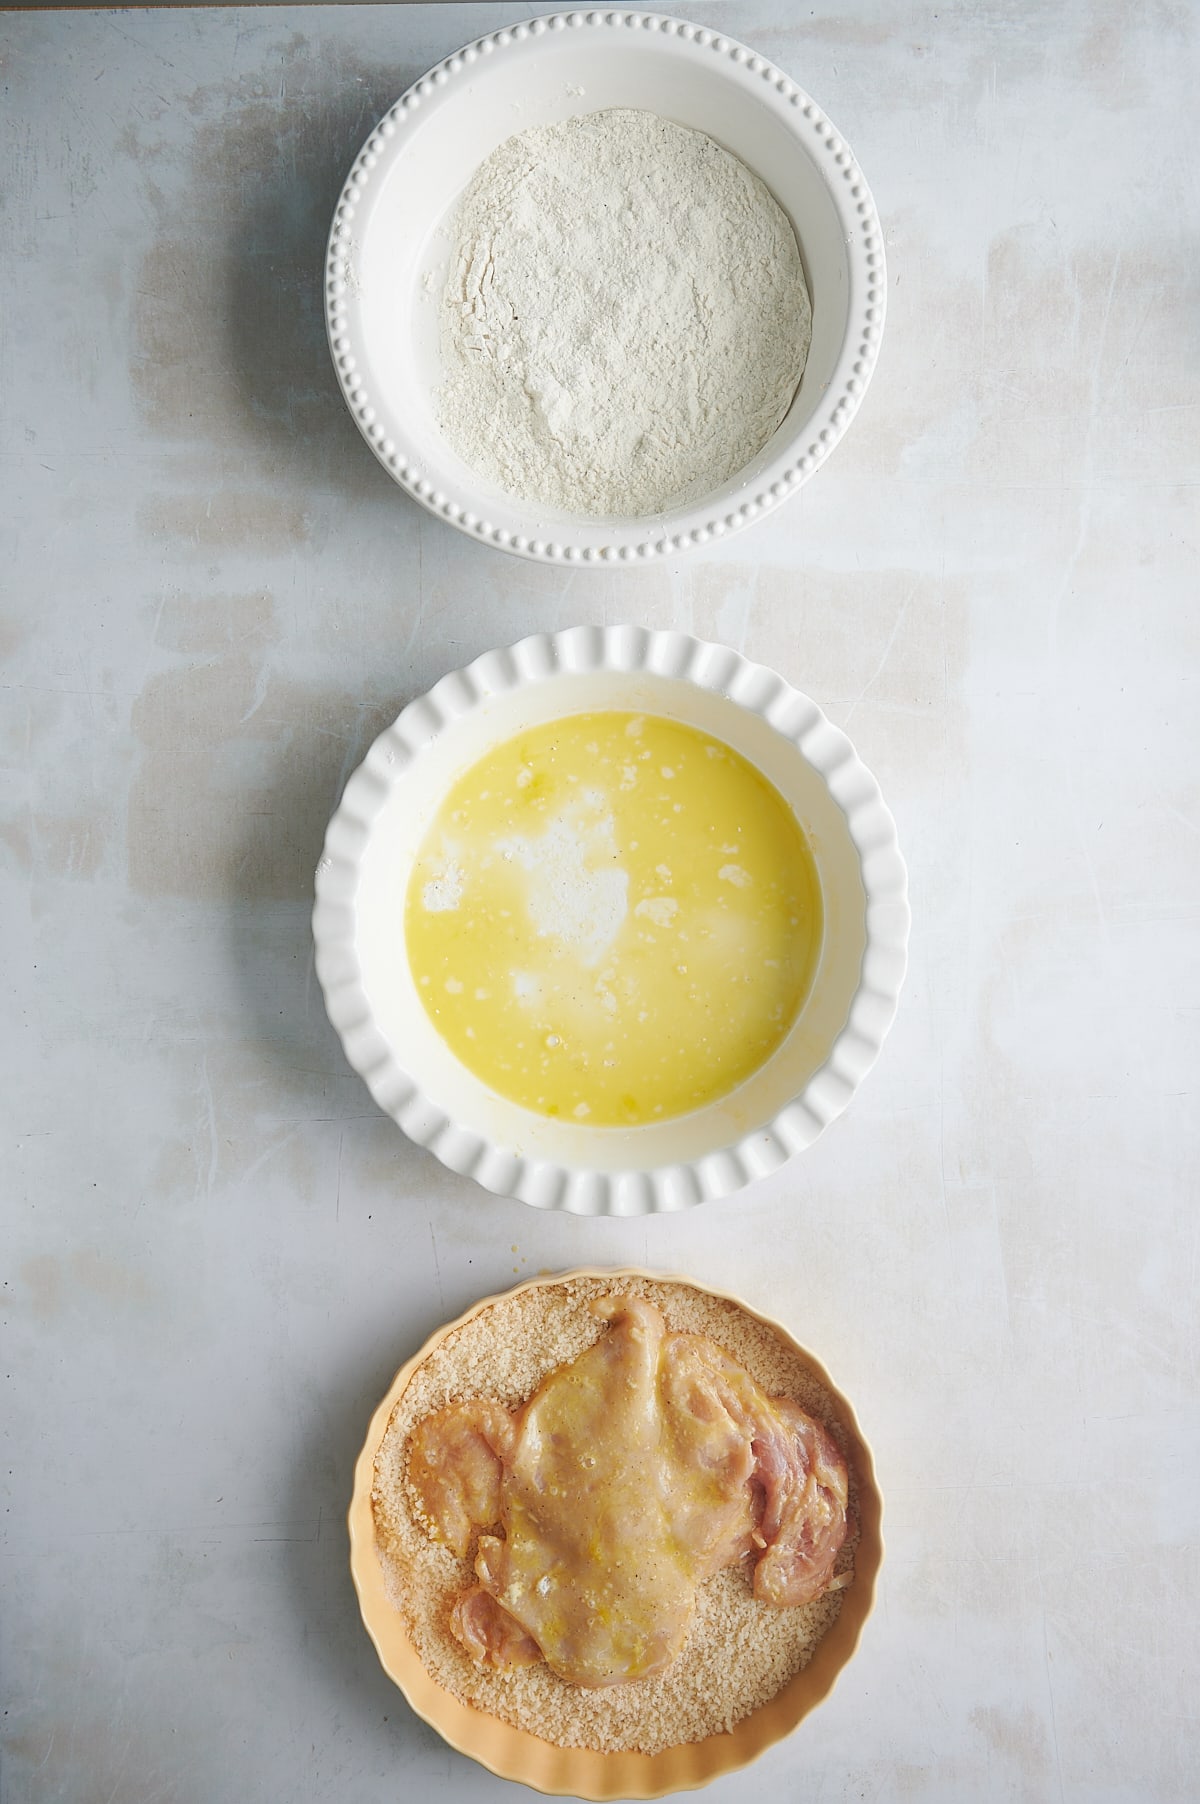
- Add the chicken to the flour blend and turn to coat. Be sure to coat all sides of the chicken – don't miss any nooks and crannies!
- Lay the chicken in the beaten egg and use a fork to turn and make sure egg is all over the chicken.
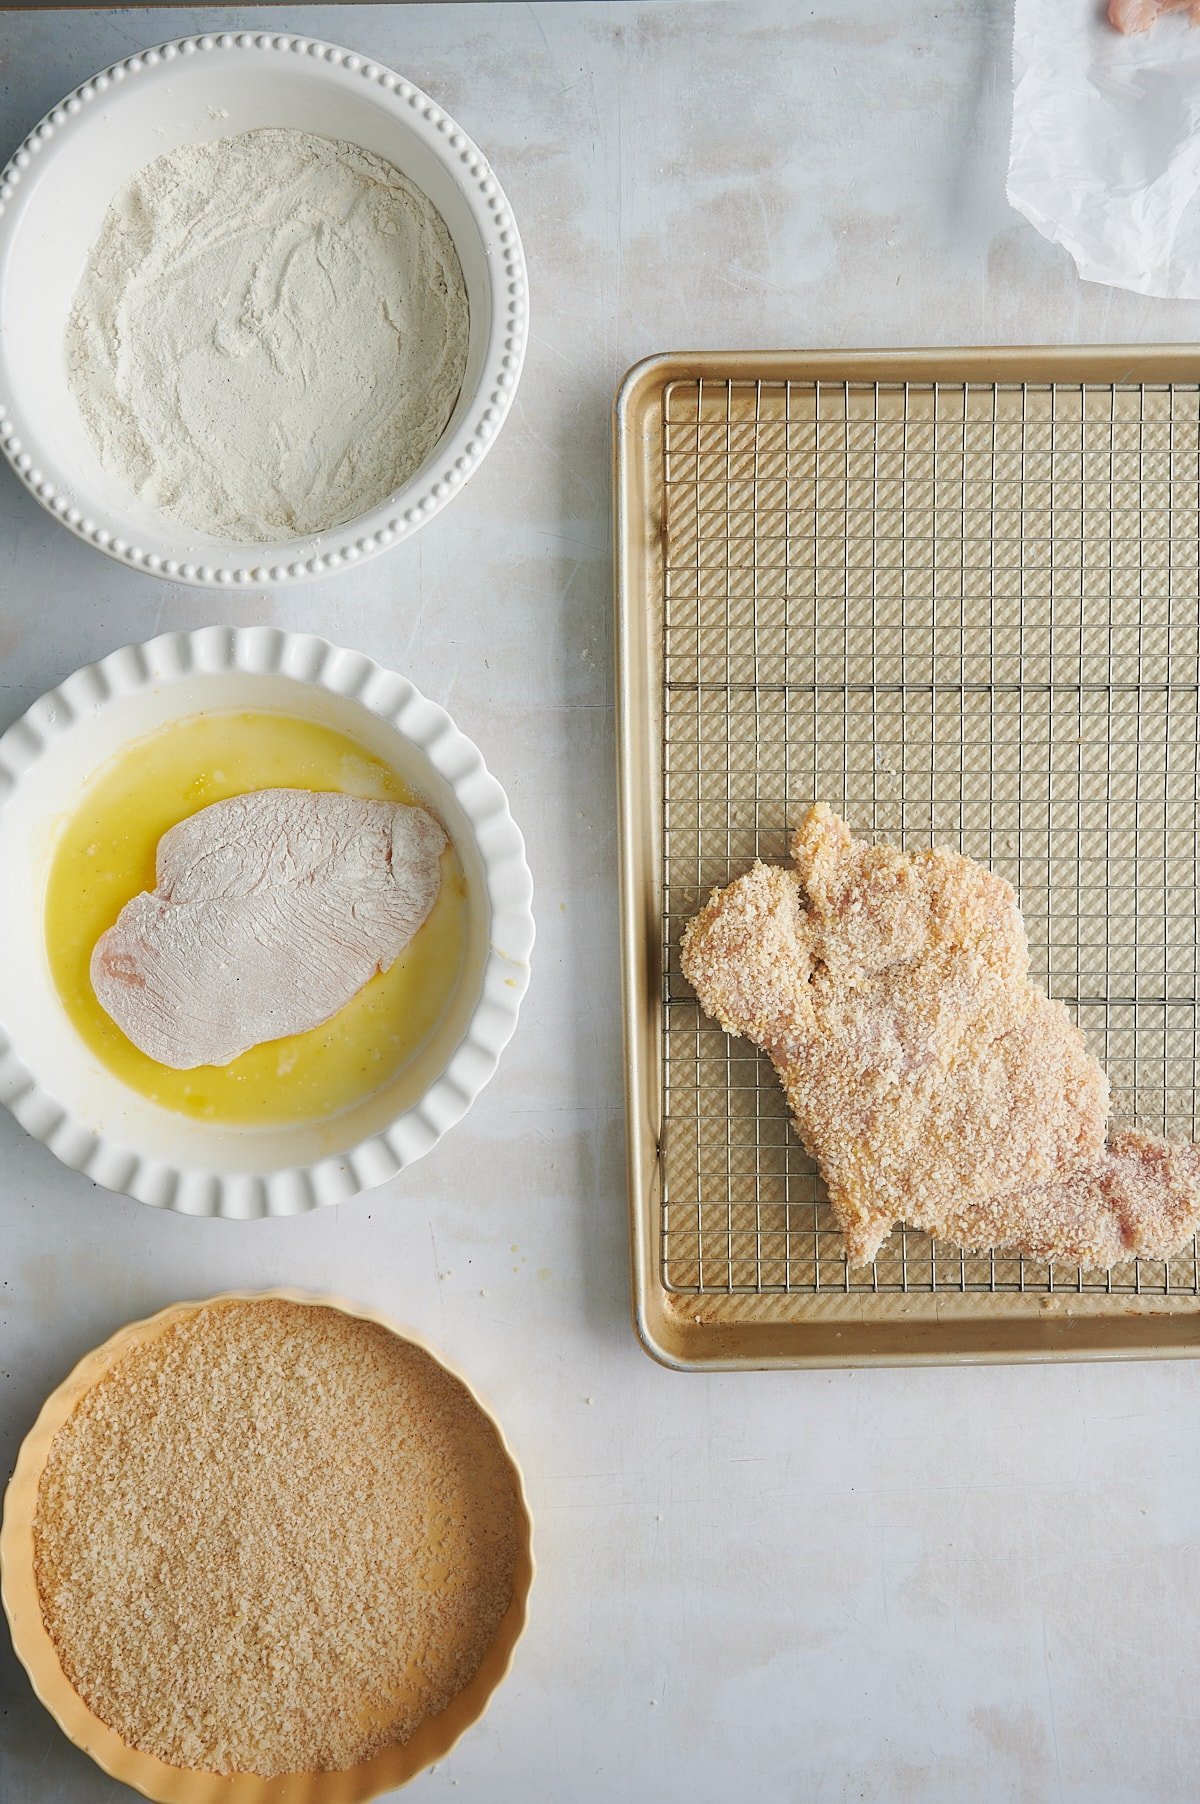
- Finally, place the chicken in the breading and firmly pat to bread the chicken. Turn and repeat on the other side. Pat more on as needed.
- Remove the chicken to a rack and refrigerate uncovered for at least 30 minutes to allow the breading to dry a bit. (You can do this the morning of the day you plan to serve it).
- To a large wide stainless steel fry pan with higher sides, pour in the oil to halfway up the sides of the pan. Heat the oil up to about 350˚ . The temperature will drop a bit once the chicken is added so watch your heat and adjust as needed to maintain 350˚.24 oz canola or avocado oil
- Use tongs to add the chicken to the hot oil, taking care to gently lay it in so you don’t splash the hot oil and burn yourself.
- After 2 minutes, flip the chicken to the other side. Repeat this 5 times for a total of 10 minutes.
- The cutlets are done when the chicken is golden brown and reaches a temperature of 166˚ when the thermometer is inserted in the middle or thickest part of the chicken breast.Remove to the rack and salt as needed. Serve immediately. Also great chilled!
Notes
- I have found that a stainless steel skillet works best for chicken cutlets.
- Don’t skip the refrigeration step for best results!!
- If you’d like to adjust the salt in the recipe, I suggest starting with reducing it in the flour step. In addition, onion powder can be substituted for some or all of the onion salt.


This is wildly salty. Like so so so salty. I knew while preparing it that is seemed like too much salt but I wanted to follow the recipe as written. I spent an hour making these cutlets only to not be able to choke them down due to the salt content. Cut the salt in half at the very least.
Oh no — I’m so sorry these didn’t work for you! Salt sensitivity is so personal, and I’ll add a note to swap onion salt for onion powder for those who don’t use a lot of salt. Thanks for taking the time to share- I appreciate the feedback.
what part of this recipe is “Italian” ? lol
A breaded chicken cutlet is classic Italian and the base for many chicken parmesan recipes. Thanks!
I made this recipe tonight and the chicken cutlets were absolutely delicious. Cannot wait to make this again. I topped the cooked cutlets with more shredded parm, grated lemon peel and a squeeze of lemon and chopped parsley. So good!!!!
So so happy you enjoyed the chicken cutlets, Carol! And I love how you prepared them with the lemon…you’re ready for Spring!
Made the crispy Italian chicken cutlets for my husband. Both of us loved them. I like how easy it was to make! Super crispy on the outside but tender on the inside.
Glad you loved them Jackie! They are my husband’s favs too (just don’t tell my daughter 😂). Thanks for taking the time to share!